My Marble Nails
I have wanted to try this forever! The marble nails are still so popular and a lot of people are trying new things with them too. I have tried it once before but it was completely ruined. To have it work you must have a white base and room temperature. If you dont know how to get your water to room temperature then pour water in the cup or bowl and leave out why you are painting your nails and getting everything ready. That is how I got the perfect water temperature. You also really need to do it in a plastic bowl or cup. I used a Solo cup like you will see below. The nail polish gets ALL over the bowl or cup so don't use a cup or bowl that you use. I've never seen it done using a Solo cup but I had no plastic bowls and the Solo cup worked great! So for my nails I wanted them to be neon and fun so I used tons of bright colors for my marble nails. You can create whatever colors you want to do and even a different color pattern on each nail. For my nails I was just experiencing and Its not as good as I wanted it to be but practice makes perfect so I will try again with maybe less colors and more of a neutral nail? You let me know if you'd like to see that! So onto the actual nails!

Chose your colors you would like to use, I used: Essie-blanc, Wet N Wild-I need a Refresh-mint, Zoya-Pippa, Essie-Lovie Dovie, and Zoya-Arizona

You will need tooth picks or something similar for removal of the polish in the water.

Again chose your colors

Make sure you have a light base. White works the best for me.

Plastic cup or bowl, because the nail polish will ruin your dishes.

Paint your nails white or whatever light color you have chosen

Tape up your fingers so the nail polish doesn't get crazy messy. You can see how messy my fingers got from this in the pictures below! I dont know what kind of tape this is and I don't recommend it HA! It was the worst tape but the other ones I had didn't work either. I recommend just the clear tape!

Make sure you leave the lids off of your nail polish so you can work quickly

Drip your first color in the bowl or cup

Then the second color, See how it expands in the water. That is what you want it to do and you'll know if you have the right temperature. You may have to try different temperatures before you find the perfect one!

Add as many colors as you want!

Then you use your tooth pick to make a design in the polish, you have to work quickly because the nail polish can dry fast in the water.

Adding my design

Then you simply dip your finger in where the polish is. I wish I got a shot of this but I didn't Your finger will magically get all the colors, if your polish in the water is bigger than your finger that is normal, it doesn't have to be all over the polish in the water! Just simply dip it in wherever on the polish. Leave it there for 5 seconds and blow on the water so the excess polish can dry then you use your tooth pick to grab the excess polish. You can put more than one finger at a time but for me I need more practice!
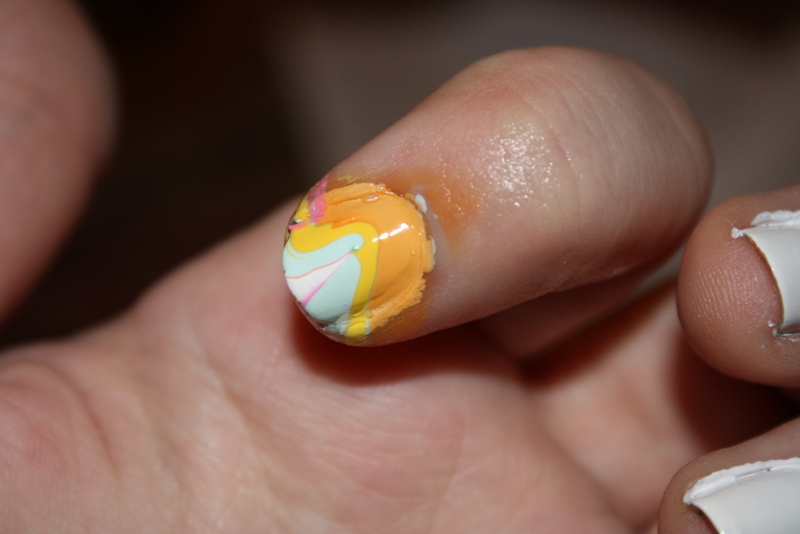
Love this one with the white still there.

That is my right hand. As you can see it is pretty messy even using tape. That is why I recommend it because it will be all the down your finger if you dont.

Love this one!

Now that your all done you can simply use a Q-tip dipped in nail polish remover to clean this up!


Again I need to clean it up a bit and I might add in another picture when Im done with that!
Here is the look after I cleaned it up:

I absolutely love this! You can be so creative and its like magic when you see your nails for the first time! This is easy but also challenging. I definitely need practice with it but thats the best thing I can try more colors! I will be having another one soon with different colors! Try it and let me know how it went for you!!
xoxo
-Kimberly
No comments:
Post a Comment